Review: Pre-Wedding Photoshoot in Korea Part 3 with Wonkyu Studio (Sixth Floor)
Thursday, 5 September 2019 at September 05, 2019
This is the third, and final part of our pre-wedding photoshoot journey where I will be talking about our experience in Korea with Wonkyu Studio! We met them for a total of 3 days in Korea, so grab a snack because this is going to be a long post. If you haven't read the first and second part where I've talked about how we booked with Wonkyu, the hiccup we encountered, and the pre-photoshoot preparations we did, here are the links to those blog posts:
A day before, I received a Whatsapp message from our translator, Ruo Lin, who confirmed the pick-up location and time with us. Since we stayed at an Airbnb, I thought it would be inconvenient for her to find the location, but it wasn't and she picked us up right below our apartment. I was expecting a private car with a private driver... But she came in a taxi and had to call another taxi to chauffeur us to Rosa Sposa. The journey took about 30 minutes from our Airbnb and in no time, we arrived at Rosa Sposa which is located at Gangnam.
Rosa Sposa has such a vintage feel to it, I love it!! We started with the groom's suit and so first, they got my boyfriend to change into the basic white button down and a black pair of pants which were included in the package. During fitting, they also provided him a pair of shoes (only for fitting!!) so you don't have to bring your leather shoes during the fitting. There are two types of white button down, one with the collar suitable for neck ties and another for bow ties. My boyfriend brought his own white shirt for his neck ties, so we had 2 options. Do note that only bow ties are provided in the package.
Waiting for the staff to get the correct size of shirt and pants out for him!
After that, it's time to pick the blazers! The lady (okay, it was an ahjumma but I'll call her 'the lady' instead because I think it sounds more polite haha) picked out a number of blazers for us according to the studio we will be shooting at, which is Sixth Floor. Only black, blue, white and grey blazers are included in the package. During the fitting, we are allowed to take photos of every blazer so we can compare and pick our favourite one at the end of the fitting session.
We decided to go with the first blazer which is a black one, as I felt that it looked the most classic and simple, a look that we had in mind already actually. After finalizing our pick, the lady also took some measurements to make some amendments and adjustments so it'll fit him better. With that, the groom's fitting session ended within about 30 minutes!
Moving on to the bride's fitting, I was allowed to try on a total of 8 dresses and only 8 dresses. By default, it is set at 3 ballgown dresses, 3 slim dresses, and 2 coloured or evening gowns. But if you want, you can make some changes like for me, I didn't want any of the coloured gowns after browsing through their collection, and so I ended up trying on 3 ballgown dresses, 3 slim dresses, and another 2 white dresses. The gowns were chosen by the designer of Rosa Sposa herself based on the images I've pinned on Pinterest and my preferences as I did tell her that I wanted some puffy sleeves and off-shoulder pieces. If you don't like any of the dresses she picked, you can choose not to try them on and she'll re-pick another one so you don't waste one chance of fitting. For every dress, they'll bring along some add-ons such as boleros for you to try on as well.
Dress fitting was exhausting going through so many looks! Since I wasn't keen on getting any coloured gowns or "evening gowns", Ruo Lin actually asked if I wanted to try out vintage wedding dresses which are apparently a trend in Korea at the moment! I didn't know what vintage gowns look like so she brought a few to me. I didn't like the look of the first dress and so I didn't try it on, but ultimately, I tried on 2 other vintage dresses to finish up all my 8 fittings.
Once we're finally done with all 8 fittings, my boyfriend and I were left alone in the room to look through the photos and decide which are the dresses I want. During this time, you must also let them know which are the add-ons you like, so they can bring it along to the studio too.
Since I have an extra mini dress included in my package, I was allowed to pick one but I wasn't allowed to try it on. I decided to go with a periwinkle and light violet coloured one to match with my boyfriend's navy suit which he brought himself, and with that, the dress fitting has successfully ended!
Day 2 (22nd April 2019): Shooting Day
We were picked up at 7:30AM and went straight to Soonsoo in a cab for our hair and makeup. For the bride, we get to put on a sheet mask first before our base makeup which was done by an assistant I suppose. My skin was horrible on the day of the photoshoot as I had a really bad break out in Korea, so it took quite awhile for her to cover up the pimples (...wanted to say imperfections but it's not an imperfection unless you see it as one!!!). Regardless, all pimples will be photoshopped away anyway, in fact, your skin will look a thousand times more flawless and poreless after they edited the photos, so don't be too stressed up about it! After base makeup, I was brought to the makeup artist for the rest of my makeup.
I did show my makeup artist a photo of what I wanted but it turned out different. It was rather disappointing since I was so excited to get my makeup done by a celebrity makeup artist but the final look turned out to be something I wouldn't attempt to recreate myself. Maybe it's because Soonsoo specializes in idol makeup so I guess I looked like I could star in a music video...? I mean, the other beauty salon, Jenny House, seems to cater more to actresses, so perhaps if I chose Jenny House, my makeup would be less heavy. Either way, I was asked a couple of times if the makeup was alright and I said it was... Because I didn't look ugly (in fact I remembered checking myself out in the toilet and telling myself 'wow I look good today' haha!)... It just wasn't a look I was used to as it was rather heavy which made my eyes look really big. Nevertheless, despite not feeling myself in the makeup, I think I actually looked great in the photos which is the most important thing isn't it?
Waiting for our turn to get our hair done!
Next, we moved to the hair salon to do our hair and once again, I showed them a photo of what I wanted and it came out looking completely different... I supposed it's because I wanted an effortless, kinda messy, wavy look, but like I mentioned in my Korean Inspired Bridal Hair-styling video, Koreans seem to go for neat looks instead. Once again, I guess they know what they were doing though because in real life, my hair was super voluminous, but weirdly, it didn't really look like that in the photos.
Finally, it was time to change into my gown at Soonsoo with the help of my assistant (who was also an ahjumma). Our first shooting location was at the hanok (Korean traditional house), and so I chose to wear my vintage gown first. After I got dressed, my makeup artist and haistylist came to check on my makeup and hair again for the final time and they also applied body makeup on my neck and chest before I leave Soonsoo. This time round, we took a 7-seater cab, but the journey from Soonsoo to the Sixth Floor studio only took about 5 minutes.
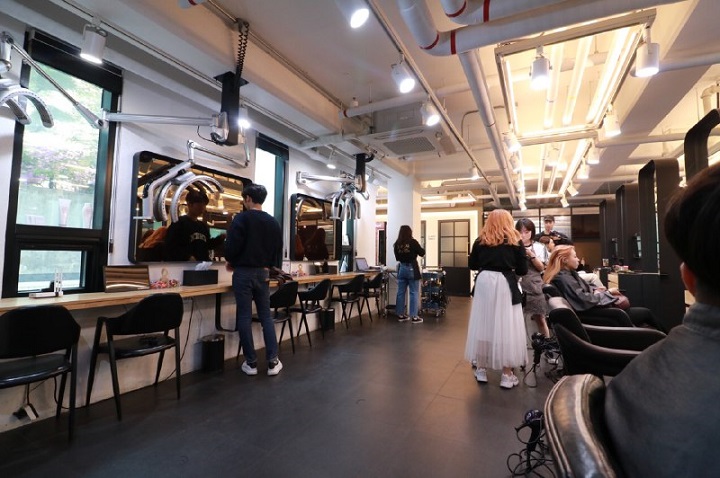
Once we arrived at the Sixth Floor studio (which is literally located on the sixth floor of a building), we had to choose 30 scenes that we want from the Sixth Floor portfolio.
Discussing the shoot with our photographer!
We didn't choose 30, I think we only chose 27, and we left the rest to our photographer to decide. I highly recommend you to choose all 30 though because after the shoot, we noticed that my boyfriend didn't get any solo shots at the Sixth Floor studio. After which, it's time to head to the hanok which is... Surprisingly located inside another building which was about a 3 minutes walk away from Sixth Floor.
Sadly, I don't have much footage of the shoot because I was told that we weren't allowed to film with a camera during the shoot (mobile phones are alright), but here are some of the behind the scenes photos taken by our candid photographer!
Started with the rooftop shoot before heading down to the hanok!
Lunch break! We had Korean take-outs and it was good!
Throughout the photoshoot, we were guided on how to pose, how to look good while kissing, where to put our feet and hands, what sort of expressions we should make, and so it was overall easy with the help of everyone at the shoot. We definitely felt the professionalism of our photographer as he paid attention to every single little detail like how a pot of plant was placed so the leaves would look better in the photos! Being an introvert, I was expecting myself to be hella awkward and shy, posing in front of people I just met, but it was surprisingly fun, just... Very, exhausting.
We wrapped up the shoot at about 5PM-ish and we were so so tired, we just decided to cab back and nap before ordering Jjajangmyun delivery for dinner!
Day 3 (23rd April 2019): Collection of Photos & After
You can pick whatever day you want to view and collect the photos, but we were so eager to see them we chose the very next day! At the Wonkyu HQ located at Seongsu, we got to view all the photos taken, we made our balance payment in cash, we got got to see a sample of the physical album, the frames, and we were also given a USB that contains all our photos! Initially, I thought well since it came in a USB, we had to wait till we're back in Singapore to look at the photos again, but nope! The Wonkyu staff who contacted me right from the beginning immediately sent me a dropbox folder on Whatsapp which contained all our photos so we could easily save them in our phone!
After we came back from Korea, we had to go through all ~800 photos (~300 candid and ~500 non-candid) to decide which will be the ones that will be edited and printed out on our album. The first re-touch took a month which included retouching of the colour and tones, as well as photoshopping any imperfections. We had many rounds of retouch and honestly it was a really annoying and frustrating process. Here are some of the photos without the retouch:
Each round took at least 2 to 4 weeks, depending on the number of photos, and I guess it was annoying because you don't communicate with the editor directly, so you can only really know if they understood what you want 2 to 4 weeks later. I would say that I'm not 100% satisfied with some of the photos because some of them went through like... 5 rounds of editing, and they still couldn't get what I want. A few issues I had were the lipstick being too red... Or I looked too white... But as I'm typing this, we've finally confirmed all the photos for printing and I guess overall, I am satisfied with how most of the photos turned out. Here are just 2 of the retouched, confirmed photos as a sneak peek:
Printing of the album and frame will take about a month and a half. Once we received them and confirmed that everything is in order, we will conclude our journey with Wonkyu Studio! I'm so excited to see how the photos will look after printing and I can't wait for you guys to see it too... At our wedding... Which will not be happening anytime soon... (LOL).
 E-Mail
  Youtube