Review: Pre-Wedding Photoshoot in Korea Part 3 with Wonkyu Studio (Sixth Floor)
Thursday, 5 September 2019 at September 05, 2019
This is the third, and final part of our pre-wedding photoshoot journey where I will be talking about our experience in Korea with Wonkyu Studio! We met them for a total of 3 days in Korea, so grab a snack because this is going to be a long post. If you haven't read the first and second part where I've talked about how we booked with Wonkyu, the hiccup we encountered, and the pre-photoshoot preparations we did, here are the links to those blog posts:
A day before, I received a Whatsapp message from our translator, Ruo Lin, who confirmed the pick-up location and time with us. Since we stayed at an Airbnb, I thought it would be inconvenient for her to find the location, but it wasn't and she picked us up right below our apartment. I was expecting a private car with a private driver... But she came in a taxi and had to call another taxi to chauffeur us to Rosa Sposa. The journey took about 30 minutes from our Airbnb and in no time, we arrived at Rosa Sposa which is located at Gangnam.
Rosa Sposa has such a vintage feel to it, I love it!! We started with the groom's suit and so first, they got my boyfriend to change into the basic white button down and a black pair of pants which were included in the package. During fitting, they also provided him a pair of shoes (only for fitting!!) so you don't have to bring your leather shoes during the fitting. There are two types of white button down, one with the collar suitable for neck ties and another for bow ties. My boyfriend brought his own white shirt for his neck ties, so we had 2 options. Do note that only bow ties are provided in the package.
Waiting for the staff to get the correct size of shirt and pants out for him!
After that, it's time to pick the blazers! The lady (okay, it was an ahjumma but I'll call her 'the lady' instead because I think it sounds more polite haha) picked out a number of blazers for us according to the studio we will be shooting at, which is Sixth Floor. Only black, blue, white and grey blazers are included in the package. During the fitting, we are allowed to take photos of every blazer so we can compare and pick our favourite one at the end of the fitting session.
We decided to go with the first blazer which is a black one, as I felt that it looked the most classic and simple, a look that we had in mind already actually. After finalizing our pick, the lady also took some measurements to make some amendments and adjustments so it'll fit him better. With that, the groom's fitting session ended within about 30 minutes!
Moving on to the bride's fitting, I was allowed to try on a total of 8 dresses and only 8 dresses. By default, it is set at 3 ballgown dresses, 3 slim dresses, and 2 coloured or evening gowns. But if you want, you can make some changes like for me, I didn't want any of the coloured gowns after browsing through their collection, and so I ended up trying on 3 ballgown dresses, 3 slim dresses, and another 2 white dresses. The gowns were chosen by the designer of Rosa Sposa herself based on the images I've pinned on Pinterest and my preferences as I did tell her that I wanted some puffy sleeves and off-shoulder pieces. If you don't like any of the dresses she picked, you can choose not to try them on and she'll re-pick another one so you don't waste one chance of fitting. For every dress, they'll bring along some add-ons such as boleros for you to try on as well.
Dress fitting was exhausting going through so many looks! Since I wasn't keen on getting any coloured gowns or "evening gowns", Ruo Lin actually asked if I wanted to try out vintage wedding dresses which are apparently a trend in Korea at the moment! I didn't know what vintage gowns look like so she brought a few to me. I didn't like the look of the first dress and so I didn't try it on, but ultimately, I tried on 2 other vintage dresses to finish up all my 8 fittings.
Once we're finally done with all 8 fittings, my boyfriend and I were left alone in the room to look through the photos and decide which are the dresses I want. During this time, you must also let them know which are the add-ons you like, so they can bring it along to the studio too.
Since I have an extra mini dress included in my package, I was allowed to pick one but I wasn't allowed to try it on. I decided to go with a periwinkle and light violet coloured one to match with my boyfriend's navy suit which he brought himself, and with that, the dress fitting has successfully ended!
Day 2 (22nd April 2019): Shooting Day
We were picked up at 7:30AM and went straight to Soonsoo in a cab for our hair and makeup. For the bride, we get to put on a sheet mask first before our base makeup which was done by an assistant I suppose. My skin was horrible on the day of the photoshoot as I had a really bad break out in Korea, so it took quite awhile for her to cover up the pimples (...wanted to say imperfections but it's not an imperfection unless you see it as one!!!). Regardless, all pimples will be photoshopped away anyway, in fact, your skin will look a thousand times more flawless and poreless after they edited the photos, so don't be too stressed up about it! After base makeup, I was brought to the makeup artist for the rest of my makeup.
I did show my makeup artist a photo of what I wanted but it turned out different. It was rather disappointing since I was so excited to get my makeup done by a celebrity makeup artist but the final look turned out to be something I wouldn't attempt to recreate myself. Maybe it's because Soonsoo specializes in idol makeup so I guess I looked like I could star in a music video...? I mean, the other beauty salon, Jenny House, seems to cater more to actresses, so perhaps if I chose Jenny House, my makeup would be less heavy. Either way, I was asked a couple of times if the makeup was alright and I said it was... Because I didn't look ugly (in fact I remembered checking myself out in the toilet and telling myself 'wow I look good today' haha!)... It just wasn't a look I was used to as it was rather heavy which made my eyes look really big. Nevertheless, despite not feeling myself in the makeup, I think I actually looked great in the photos which is the most important thing isn't it?
Waiting for our turn to get our hair done!
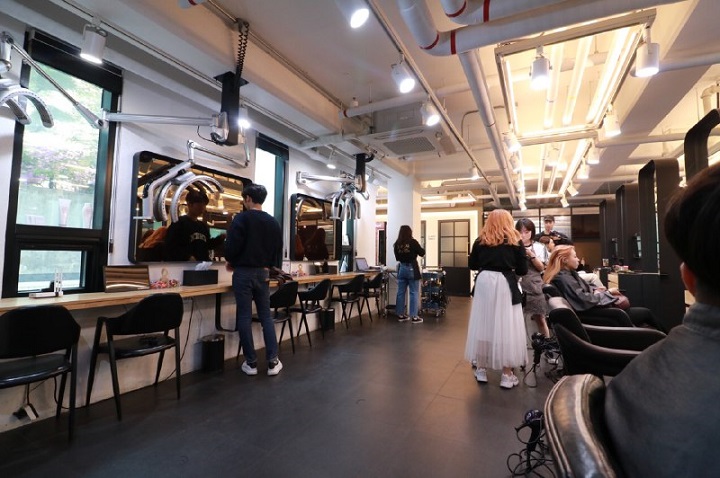
Next, we moved to the hair salon to do our hair and once again, I showed them a photo of what I wanted and it came out looking completely different... I supposed it's because I wanted an effortless, kinda messy, wavy look, but like I mentioned in my Korean Inspired Bridal Hair-styling video, Koreans seem to go for neat looks instead. Once again, I guess they know what they were doing though because in real life, my hair was super voluminous, but weirdly, it didn't really look like that in the photos.
Finally, it was time to change into my gown at Soonsoo with the help of my assistant (who was also an ahjumma). Our first shooting location was at the hanok (Korean traditional house), and so I chose to wear my vintage gown first. After I got dressed, my makeup artist and haistylist came to check on my makeup and hair again for the final time and they also applied body makeup on my neck and chest before I leave Soonsoo. This time round, we took a 7-seater cab, but the journey from Soonsoo to the Sixth Floor studio only took about 5 minutes.
Once we arrived at the Sixth Floor studio (which is literally located on the sixth floor of a building), we had to choose 30 scenes that we want from the Sixth Floor portfolio.
Discussing the shoot with our photographer!
We didn't choose 30, I think we only chose 27, and we left the rest to our photographer to decide. I highly recommend you to choose all 30 though because after the shoot, we noticed that my boyfriend didn't get any solo shots at the Sixth Floor studio. After which, it's time to head to the hanok which is... Surprisingly located inside another building which was about a 3 minutes walk away from Sixth Floor.
Sadly, I don't have much footage of the shoot because I was told that we weren't allowed to film with a camera during the shoot (mobile phones are alright), but here are some of the behind the scenes photos taken by our candid photographer!
Started with the rooftop shoot before heading down to the hanok!
Lunch break! We had Korean take-outs and it was good!
Throughout the photoshoot, we were guided on how to pose, how to look good while kissing, where to put our feet and hands, what sort of expressions we should make, and so it was overall easy with the help of everyone at the shoot. We definitely felt the professionalism of our photographer as he paid attention to every single little detail like how a pot of plant was placed so the leaves would look better in the photos! Being an introvert, I was expecting myself to be hella awkward and shy, posing in front of people I just met, but it was surprisingly fun, just... Very, exhausting.
We wrapped up the shoot at about 5PM-ish and we were so so tired, we just decided to cab back and nap before ordering Jjajangmyun delivery for dinner!
Day 3 (23rd April 2019): Collection of Photos & After
You can pick whatever day you want to view and collect the photos, but we were so eager to see them we chose the very next day! At the Wonkyu HQ located at Seongsu, we got to view all the photos taken, we made our balance payment in cash, we got got to see a sample of the physical album, the frames, and we were also given a USB that contains all our photos! Initially, I thought well since it came in a USB, we had to wait till we're back in Singapore to look at the photos again, but nope! The Wonkyu staff who contacted me right from the beginning immediately sent me a dropbox folder on Whatsapp which contained all our photos so we could easily save them in our phone!
After we came back from Korea, we had to go through all ~800 photos (~300 candid and ~500 non-candid) to decide which will be the ones that will be edited and printed out on our album. The first re-touch took a month which included retouching of the colour and tones, as well as photoshopping any imperfections. We had many rounds of retouch and honestly it was a really annoying and frustrating process. Here are some of the photos without the retouch:
Each round took at least 2 to 4 weeks, depending on the number of photos, and I guess it was annoying because you don't communicate with the editor directly, so you can only really know if they understood what you want 2 to 4 weeks later. I would say that I'm not 100% satisfied with some of the photos because some of them went through like... 5 rounds of editing, and they still couldn't get what I want. A few issues I had were the lipstick being too red... Or I looked too white... But as I'm typing this, we've finally confirmed all the photos for printing and I guess overall, I am satisfied with how most of the photos turned out. Here are just 2 of the retouched, confirmed photos as a sneak peek:
Printing of the album and frame will take about a month and a half. Once we received them and confirmed that everything is in order, we will conclude our journey with Wonkyu Studio! I'm so excited to see how the photos will look after printing and I can't wait for you guys to see it too... At our wedding... Which will not be happening anytime soon... (LOL).
Review: Pre-wedding Photoshoot in Korea Part 1 (Picking a Studio & FAQ)
Monday, 13 May 2019 at May 13, 2019
Hello and welcome to part one of my "pre-wedding photoshoot in Korea" blog post series! Since this is my blog after all, let's start with a short story-time. It all started on this fateful night during dinner in August 2018, when my parents popped this question to me, "when are you getting married?". I choked on my food before answering, "are you asking the right person?". Well, yeah, they were asking the right person. For some reasons I always have the impression that I'm still young, which is good in some sense, but not really when in reality you're sorta just procrastinating the "adult duties" such as planning for your wedding. Their concern was definitely kind of like a wake up call for me as I calculated and realised that crap, I don't have much time left till I'm 30.
I'm the kind of person who needs to have everything planned and organized, and so right after they threw that question to me, I started doing some planning for the future with my boyfriend. After a little bit of planning, we felt that we need to get our pre-wedding photoshoot done first because of a couple of reasons. No, we're not getting married in a few months time so don't bother asking. But I'd say the main reason is, I was 26 and I don't believe my skincare regime is powerful enough to keep me looking like a 26 year old for long, and I wanna look young in the photos! Another huge reason is that we want to have our photos taken in Korea and we already had plans in 2018 to visit Korea again in 2019 so, why not do it at the same time?
That said, we, or rather I, started sourcing for a studio in Korea. Before I started my research, I was a little bit worried because pre-wedding photoshoots are not cheap, moreover if you're planning to do it in a different country, things can get confusing, such as, I didn't know if I needed an agent, a translator, and whatnot. But surprisingly... The entire process was pretty easy! Therefore, for part one of this three parts series, I'm going to share with you how we chose, and book a studio in Korea.
I personally feel that the very first step is to browse through different pre-wedding photos online to find out the type that suits your taste best. Do you prefer indoor, or outdoor shoots? Simple, or extravagant? There are a ton of choices available, so make sure to narrow them down to the ones that you like. As you already know from what I've mentioned earlier on, my boyfriend and I chose to have our photos taken in Korea and I think the main reason is simply because the aesthetics suited our taste better. We also came to an agreement that the both of us prefer indoor shoots. Once you've decided on those, it's time to find some studios.
An obvious disclaimer: Since we will be taking our photos in Korea, this is based on my experience looking for a studio in Korea. So if you're looking to take your photos in like... Taiwan or New Zealand, or somewhere else, this isn't the right blog post for you.
I started by browsing through Hello Muse which is a Korea pre-wedding photoshoot agent. Another popular agent is Mr.K Wedding but I personally prefer the layout and website of Hello Muse. At Hello Muse's website, you get to see a good amount of different studios and sets available. Of course, if the studio doesn't work with Hello Muse, you won't be able to find them on there, but I find that the selections on Hello Muse are more than enough.
Each option you see is basically a set, so once you see something you like, click on it to find out the name of the set as well as the studio that is offering it (example the set below is provided by "Pium Studio").
After I have about 5 options in my excel file (excel is my life), I e-mailed Hello Muse to find out more details about the packages and on top of that, I also went to search for the studios on Google so I could e-mail them directly to ask about their prices and packages. Remember to indicate that you're a foreigner when inquiring about their packages because they do have different packages to cater foreigners (and trust me, you'll need it unless you speak fluent Korean!). It is also at this point I realize that not all studios are foreigner-friendly as some of them responded back in Korean, telling me that they can't speak English.
(a portion of my excel file along with the rates I got from Hello Muse, *obviously not the latest as you can see it was from August 2018)
Q:What is the price range? A: For Seoul studios, price ranges from S$2000 onwards. But I believe S$2000 is more for outdoor shoots, while the average for indoor studio shoots starts from S$3000 ~ S$5000. Shoots in Jeju are more expensive.
Q: What are the differences between a S$3000 and S$5000 photoshoot in Korea?
A: As the saying goes, "you get what you pay for", so the difference in price can be additional things included in the package, or simply "better quality" of the basic things provided. During my research, I found out that on average, here are the basic things that should be included:
Wedding dresses and tuxedo, hair and makeup service, accessories and shoes for the bride, 1 x photo album, 1 x framed photo, CD or USB with all photos taken, shipping charges for the album and photo frame, transportation during the photoshoot, an assistant, a translator, and editing service only for the photos chosen.
Some of the additional things that may cost the price difference are:
Extra gowns, extra night or outdoor scenes, additional day for gown and suit fitting, more pages in your photo album (the minimum pages I saw was 20 pages while the max was 40 pages), more printed photos, preview service (meaning you get to preview them before the printing), video slideshow, e-invitation cards, snacks or food provided during your photoshoot, etc.
"Better quality" of the basic things may be:
Designer gowns and suits, hair and makeup service is outsourced to top beauty salons in Korea, higher quality frame, senior photographer and editor, etc.
Q:What are the differences between liaising with an agent and directly contacting the studio? A: The price differs and it's mainly due to the same reasons as stated above (i.e. different things offered in the package as agents usually work with different beauty salons and dress shops). Also, not all studios are able to communicate in English, so if you are really, really, keen to get your photos taken by a studio that doesn't have a staff that speaks English, you're better off sticking with an agent.
Q: Isn't it more costly to have your photoshoot in Seoul as compared to in Singapore due to other expenses like air tickets and accommodation?
A: Firstly, since my boyfriend and I were already planning a trip to Korea, we will still incur the travelling expenses regardless of whether or not we will be getting our pre-wedding photoshoot done in Korea. Secondly, for the sake of answering this question (as many people including my family has asked me about it), I approached Artiz Studio, a really popular Korean studio that actually has a studio here in Singapore (so you don't have to incur those travelling costs), to ask about their prices and for the same price, we definitely got a better deal in Korea in terms of what is offered in the package.
After following a bunch of these studios on Instagram, comparing prices, reading reviews, we narrowed down our choices to Wonkyu Studio, GaEul Studio, and Chungdam Studio.
GaEul Studio has some really captivating, magical, and fairy-tale liked backgrounds, and my boyfriend also really liked the rooftop shoot that they offer (click here to view their samples!). I was keen on them since we both liked their concept, plus they were also more affordable compared to the other two. But the thing that made me strike them out of my list is that both the dresses and the hair and makeup service will be provided and done in-house and I'm just not digging that because I think hair and makeup plays a super important role and I'd prefer to get mine done at a proper, reputable beauty salon.
Chungdam Studio is a super popular one with lots of positive reviews. I was attracted to them because they offer an outdoor shoot at an abandon theme park!
Just look at how pretty and unique these photos are! They have a few packages available and so the price varies, but the one I was interested in was their indoor + outdoor package which includes the theme park shoot + an indoor shoot with more backgrounds. Price wise, they are pretty reasonable as well. However, after looking through the photos, we felt that the style didn't really reflect what we were looking for. The photos are very bright and has a young, cheery vibe to it which... Really isn't our cup of tea.
Therefore, after many months of consideration, we finally decided to go with Wonkyu Studio. Random fact: Wonkyu Studio's portfolio on Hello Muse was actually the very first one that caught my eye so... It feels kinda trippy that in the end, I went with the very first one I clicked on.
Wonkyu Studio is one of Korea's top pre-wedding studios and they have even worked with various celebrities and popular variety programmes such as "We Got Married" and "Running Man". The wedding dresses and tuxedo they provide are from Rosa Sposa, a designer dress shop located in Gangnam that has also worked with many Korean celebrities, so you know that you'll be spoiled for choices. On top of that, you get to choose between 2 celebrity beauty salons, Jenny House and Soonsoo! Take a look at some of the works by Soonsoo (all pictures credits to the rightful owners):
(Girls' Generation Kim Hyo Yeon)
(Red Velvet's RBB concept shoot)
(Red Velvet Yeri)
That being said, the prices of their studios are... Expensive... In Korea standards of course, because like I said, our package included so much more than what you can get here in Singapore for the same price. In this case, we decided that we didn't mind spending more for Wonkyu Studio as we felt that our pre-wedding photos will be hung up on our wall and placed around our future home for hopefully as long as we live, so if we need to stay with these pictures for the rest of our lives... We have to make sure that we love it and we really love the overall style and mood that Wonkyu Studio's photos deliver.
Wonkyu Studio offers a total of 6 different indoor studios (or "sets") and the price starts from approximately S$4,400/- (3,600,000won). Choosing between the studios wasn't difficult for us at all since a particular studio has already gotten our attention since the beginning, the Masterpiece studio (as pictured above). Wonkyu Studio practices a strict fixed price policy so you can rest assure that there will not be any additional charges... Or further discounts. That said, to get a better deal out of this "fixed price policy", you can always try asking them to include more things for you, or wait for promotional periods where they'll gladly offer you more things in the package.
My boyfriend and I are not risk takers and so putting in our deposit took us great efforts as we had to make sure over and over again that Wonkyu Studio is our final decision. We actually missed the promotion period due to us not wanting to commit so early, plus we haven't booked our air tickets then. But finally in November, we decided to lock in our choice and well, go for it! Thankfully, Wonkyu very kindly agreed to give us the promotional package and so here's what's included in our package:
Photoshoot with Studio Wonkyu's top photographer and assistant, all photos taken during the shoot, 2 white wedding gowns and 1 evening gown or mini dress, 1 set of tuxedo, hair and makeup by celebrity beauty salon, all accessories including lace caplet and boleros, exclusive re-touch by Studio Wonkyu for 30 photos which will be made into a photo album (made in Korea), 1 Mulasec frame (100cm x 67cm, made in Korea), international delivery for the album and frame, assistant, translator, transportation. *Additional promotion items: 1 mini dress, candid snaps, 2 x 8R printed photos with frames, photo slideshow.
Note: This is just what we were offered when we booked our package in 2018. Items included in the package and prices are subjected to change.Communicating with Wonkyu was a piece of cake because they have offices in Singapore, Malaysia, Indonesia, etc. After I sent them my first e-mail, they appointed an English-speaking staff from Indonesia who assisted us all the way through. We also communicated through Whatsapp which was so convenient for the both of us so I highly recommend you to contact them directly to get the updated information!
After we've paid our deposit and signed the contract, we thought everything was confirmed and finalized. Little did we know that things could still go wrong after that. In part two of my "pre-wedding photoshoot in Korea" blog post series, I'll be sharing with you what went wrong, as well as the pre-photoshoot preparations you'll need to do, so see you in the part two! x
 E-Mail
  Youtube